

|
|
|
|
|
|
#1
 03-25-2012, 11:23 AM
|
||||
|
||||
|
W123 sedan door seal replacement (photos)
Folks,
Today we successfully replaced all four (4) door seals with genuine MB ones ordered from Germany. It was costly, but worth it  ... ...Here are photos I took of the process, for reference. I shall post the pertinent information later on (part numbers, clips, etc) required. This only applies to SEDAN repairs, maybe wagons (and definitely coupes) are different. Bad seal on front door:  Bad seal on rear door: 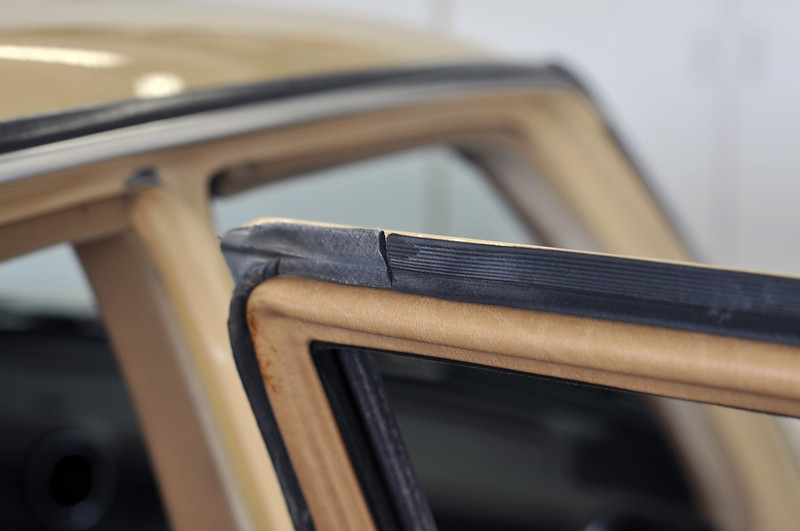 Note that this appears bad but the seal under the door shell (window frame) is still intact:  You can tell it'll eventually need attention by looking for the small cracks at the edges (without having to pull on the rubber seal, only to break apart as you do so): 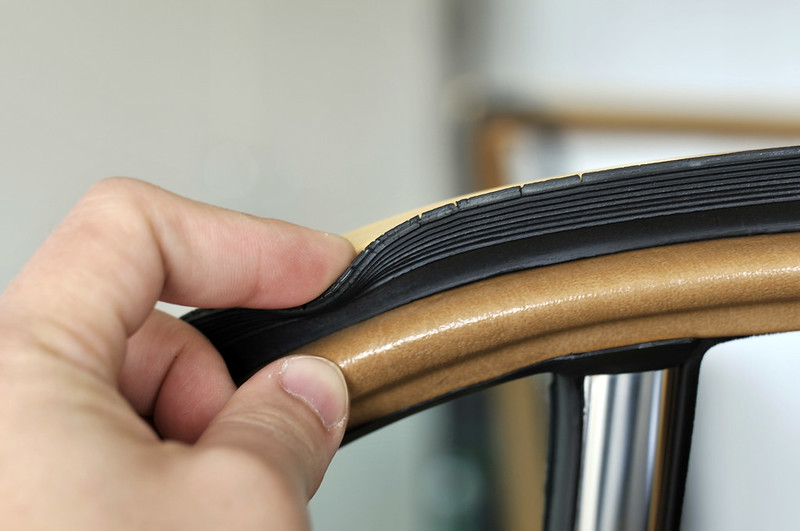 The rear doors (wagons may apply here - owners please confirm) will have the quarter window, and hence will have the threads for the fastener poke up into the vinyl. The rubber seal has a notch in it for this purpose. 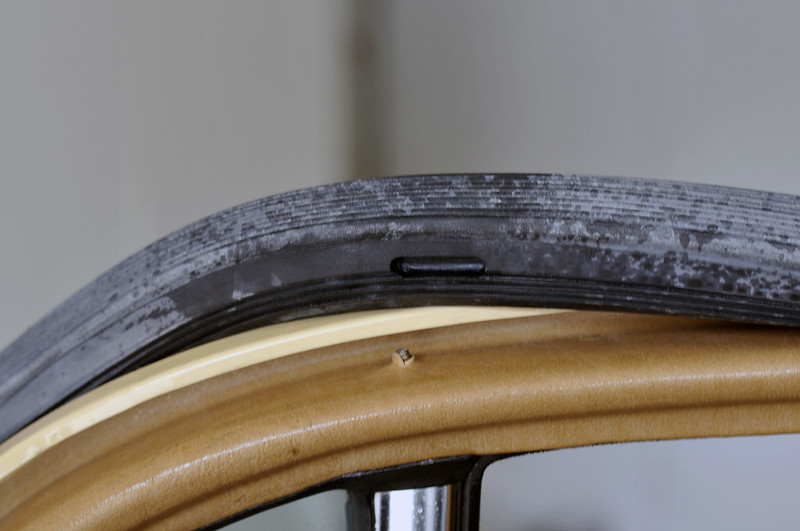 Note how the portion of the rubber seal hidden inside the door (window frame) is still in good shape, but the portion exposed to the environment is not:  Here's a cross section of the seal that touches the vehicle body as well to provide the seal as the portion that goes inside the window frame channel: 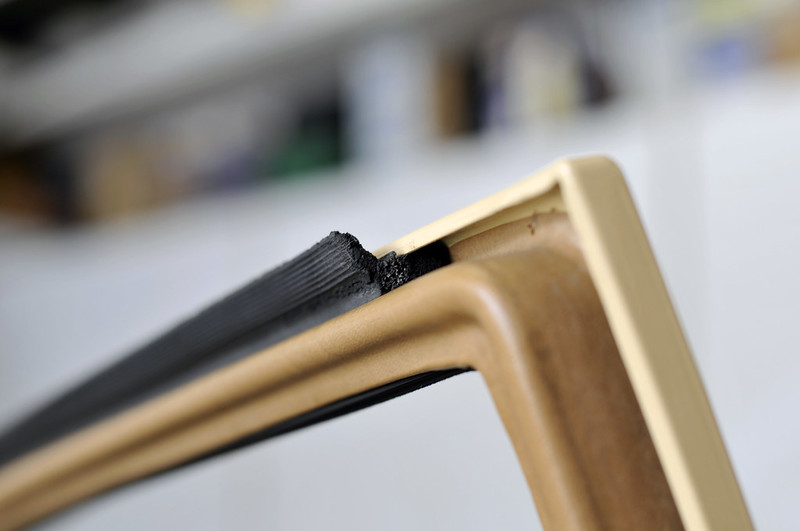 The new seal is expansive, but soft and pliable. Expansive because it's a larger "volume" than the same section of dried and hardened rubber seal. This means it'll be very difficult to install due to its very tight tolerance. The doors are now VERY hard to close, it feels like the door latches are missing the little rubber pieces. And when you open them, it feels like the car is pushing them out (like there's internal pressure in the cabin).  However this is normal, and will settle over time. From my observation, the driver's door is probably the most used so it's the easiest to replace the seals. The front passenger and left rear door are somewhat more difficult due to less use, but still not that bad. The right rear door was the hardest to replace the seals, maybe because it is the door least used. When the new seal is installed, they'll "bacon" (become wavy) because the elasticity will fight each other to find the correct tension throughout the door frame. 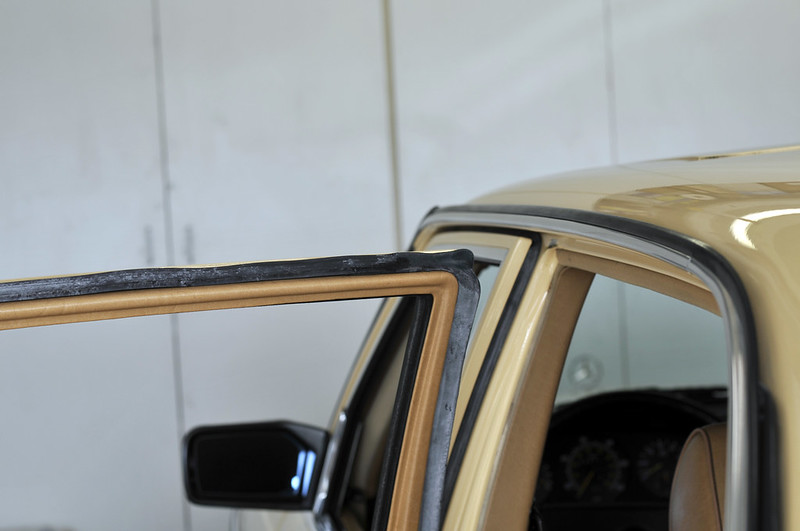 Now is also a good time to clean up these parts thoroughly BEFORE putting on the new seal. The vinyl that covers the door window frames are also hit or miss, sometimes they'll be in good shape you can keep them. But other times they're already in poor condition and it might just be best to remove them. However my observations during this event made me think the vinyl covers have adhesive behind them, to glue them to the door frame. 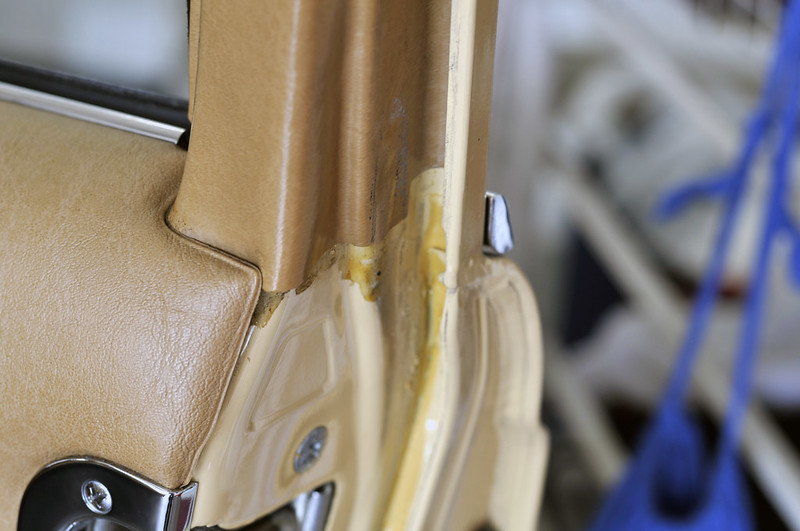  I did notice a significant enough drop in cabin noise when at highway speeds, and that I can't hear my horn as much as I did before (considering it's more powerful than stock).
__________________
http://farm8.staticflickr.com/7271/7...144c3fc1dc.jpg 
|
|
#2
03-25-2012, 12:16 PM
|
||||
|
||||
|
Nice job. One tip I might add, when I did my door seals, I didn't notice any difference in the whistling that I was trying to get rid of. What I found out years later is that the top of the door frame was slightly bent out from years of closing the door. Since the part of the door that goes around the top is so thin it's not uncommon for it to bend outward over time. I put a block of wood in the door on the handle side to keep a gap in the door when I pushed it closed. Then I rolled the window down and pushed on the upper part of the door, bending it back in, until is lined up with everything like it's supposed to. Whistle Gone!
Also the front doors on the wagons are exactly the same as the sedans front doors. The rears are a little different shape but I'm guessing the seal replacement process is just the same.
__________________
Andrew '04 Jetta TDI Wagon  '82 300TD ~ Winnie ~ Sold '77 300D ~ Sold
|
|
#3
03-25-2012, 04:59 PM
|
||||
|
||||
|
Great photo's and writeup.
Did you try liquid soaping the door frame before you put the new rubber in ?
__________________
1985 300D 198K sold 1982 300D 202K 1989 300E 125K 1992 940T "If you dont have time to do it safely, you dont have time to do it" "The democracy will cease to exist when you take away from those who are willing to work and give to those who would not."
|
|
#4
03-25-2012, 09:35 PM
|
||||
|
||||
|
Quote:
No, we did not use liquid soap. However, we did use some silicone spray just to get the rubber seals inside the door frame channels. 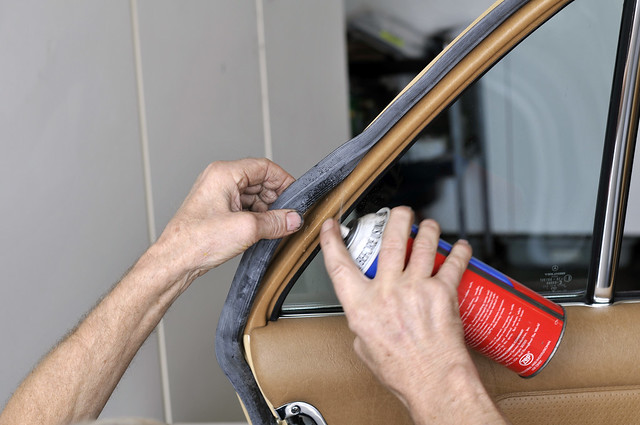 I also wiped down the new rubber seals with a generous amount of Aerospace 303. After a day, the doors seem easier to close. Yesterday, however, after the work was done we drove the car around with lots of stopping. So that might have helped. I'll re-apply some 3M weatherstrip adhesive if necessary. A 5 oz tube of the yellow stuff is MORE than enough for this task.
__________________
http://farm8.staticflickr.com/7271/7...144c3fc1dc.jpg
|
|
#5
03-25-2012, 10:50 PM
|
||||
|
||||
|
Thats good to know.
Did you slide it in from one end and slide to the end or pooch it in as you went ? Im likely to be doing this soon too.
__________________
1985 300D 198K sold 1982 300D 202K 1989 300E 125K 1992 940T "If you dont have time to do it safely, you dont have time to do it" "The democracy will cease to exist when you take away from those who are willing to work and give to those who would not."
|
|
#6
03-25-2012, 10:57 PM
|
||||
|
||||
|
Good question, I forgot.
We can't slide it in from one end, as the seal is whole (no beginning or end). So we placed the seal "template" on the door frame once it was prepared for this next step, then slowly placed in the corners (markers) and curved the seal in place. There is a trick, you have to use a circular motion, standing on the outside portion of the doors, and curl them in using your fingers. This way, the lip of the new rubber seal touches the door frame, and acts as a pivot point. We did this for almost the entire length of the seal, at some parts using the weatherstrip tool if our fingers were too tired or if the area required a flatter space our fingers couldn't slide into. Brace yourself for the price, they were around $110+ each. Quote:
") ). However my mechanic recommended to have the driver door realigned once the seal has settled in place. I do recall that some tow truck drivers use this technique of slipping an air bladder in between the B pillar and driver door to get the door to open enough and access the lock pin to unlock the car in an emergency. ). However my mechanic recommended to have the driver door realigned once the seal has settled in place. I do recall that some tow truck drivers use this technique of slipping an air bladder in between the B pillar and driver door to get the door to open enough and access the lock pin to unlock the car in an emergency. It seems like the clips would work the same on wagons, but I wanted to make sure the rear portion where it's different in comparison to sedan doors, has no extra clips. If others have good info to add on this topic, this is a good thread to collaborate that info.
__________________
http://farm8.staticflickr.com/7271/7...144c3fc1dc.jpg Last edited by MBeige; 03-26-2012 at 03:12 PM.
|
|
#7
03-28-2012, 12:58 AM
|
||||
|
||||
|
Here are the p/n's required for a typical job, to replace the "consumable" items like the rubber seal and plastic rivets/clips:
123-720-15-78 (left front door) 123-720-16-78 (right front door) 000-987-10-15 (round clips = 6 per door, 12 total) 123-730-01-78 (left rear door) 123-730-02-78 (right rear door) 000 990 24 92 (black rectangular plastic river = 1 per door, 2 total) 001-988-24-78 (white rectangular clips = 4 per door, 8 total) And
__________________
http://farm8.staticflickr.com/7271/7...144c3fc1dc.jpg
|
|
#8
03-28-2012, 01:45 AM
|
|||
|
|||
|
Would this be one of those things where you REALLY should get OEM over anything else, like with the windshield seals?
__________________
1983 240D, 272K+ miles (odo broke)
|
|
#9
03-28-2012, 11:29 AM
|
||||
|
||||
|
Quote:
The seals were a perfect fit.
__________________
http://farm8.staticflickr.com/7271/7...144c3fc1dc.jpg
|
|
#10
03-28-2012, 08:38 PM
|
|||
|
|||
|
I just replaced the RR door on my '83, and got the seal from Phil- it fit perfectly. The door is a little reluctant to latch as you mentioned. It is getting better with the passage of time.
When I had the windshield replaced, I used an OEM windshield and seal and had it done at an MB dealer.
|
|
#11
03-28-2012, 10:52 PM
|
||||
|
||||
|
$110 sure gives one pause. For all my doors thats close to my MB cost.
__________________
1985 300D 198K sold 1982 300D 202K 1989 300E 125K 1992 940T "If you dont have time to do it safely, you dont have time to do it" "The democracy will cease to exist when you take away from those who are willing to work and give to those who would not."
|
|
#12
03-29-2012, 01:45 AM
|
||||
|
||||
|
Quote:
  This image also shows the seals were manufactured in late 2011.
__________________
http://farm8.staticflickr.com/7271/7...144c3fc1dc.jpg Last edited by MBeige; 03-29-2012 at 03:19 PM.
|
|
#13
03-29-2012, 10:36 AM
|
|||
|
|||
|
Quote:
__________________
1983 240D, 272K+ miles (odo broke)
|
|
#14
03-29-2012, 03:30 PM
|
||||
|
||||
|
Quote:
__________________
http://farm8.staticflickr.com/7271/7...144c3fc1dc.jpg
|
|
#15
04-03-2012, 10:41 PM
|
||||
|
||||
|
The job was performed 03-24-2012 and it's now 04-03-2012. After almost a week and a half post-DIY, I'm happy to report the doors are now almost back to the "normal" feel prior to the work performed.
When opening the doors, the moment the doors are opened, it feels like they're being pushed from the inside because the doors "pop" open. Upon closing of the doors, it now doesn't take as much force as it did a week ago to get the doors to close. Here are the tools used in this job, I'm sure you folks can get creative with other tools but as a FYI:  1. Pick for getting old seals out and inserting new seal into tight spaces 2. Door panel tool to insert new seal into channels 3. Hammer to remove door check strap pin 4. 6" socket extension to obtain better leverage for installing the white, round plastic clips 5. Blue painter's tape to avoid paint scratches when using hammer on door jamb 6. 3M Super Weatherstrip Adhesive (yellow) 7. Silicone spray (water-based) 8. (not in photo) touch up paint of correct color for door check strap & pin
__________________
http://farm8.staticflickr.com/7271/7...144c3fc1dc.jpg Last edited by MBeige; 04-04-2012 at 02:58 PM.
|
 |
| Bookmarks |
|
|


 Linear Mode


